
uPLOADING
PRODUCTS
Your key to uploading merchandise onto Shoppe Online.
OPTIONS FOR UPLOADING YOUR PRODUCTS
We offer three different options to upload your products and product information onto Shoppe Online
-
We are excited to announce that Shopify users can now sync products and product information directly from Shopify to Shoppe Online!
To set up your Shopify integration and import your products as well as inventory and order syncing, please follow these step-by-step instructions.This feature ensures that your Shopify store and the Shoppe Online platform are always up-to-date with your latest inventory levels and order statuses.
As a note, your Shopify tags will transfer over to Shoppe Online during the integration, but we suggest exporting your products once they have transferred over to make sure the product tags have transferred over. If they have not, you can add them to the exported CSV and re-upload that CSV.
Please note that Shopify Metafields will not carry over during the Shoppe Online integration. If you need to adjust the order of your products after they have transferred over, you can do so in the Sort Order column of your exported CSV as well. More information about useful taxonomy features and CSV changes can be found in the CSV template and Taxonomy Guide.
-
You are able to upload a CSV product file using our Product File Template.
To create and upload a CSV Product File, please see the instructions in the section below titled “How to Create & Upload Your CSV Product File”
-
You may manually add products to your Collection by clicking “Edit Profile”, then “Add An Item”. Please watch the video here for step-by-step directions.
Please note that the order of the products and Product Tags can only be added and edited through the CSV file. You are unable to manually change the order of products on the site, or add product tags.
How To CreatE & UPload Your CSV Product File
1. Create Your CSV Product file
Due One Month after receipt of the Shoppe Object Welcome Email (New Brands Only)
Please download the Product File Template below AND watch this Tutorial Video before starting to build your Product File.
This deadline is to review your product file to ensure that your formatting is on the right track. Please submit a complete file (to the best of your ability). You may submit a file for a review at any time up to this deadline.
-
-
-
Step 1 - Export your items into a CSV file.
Exporting Product CSV from Shopify
Step 2 - Add the following columns to the file:
1. Min Quantity
2. Product Status
3. Sort Order
4. Color
5. Room
6. Origin
7. Values
8. Materials.
Please note: Each product allows maximum 2 types, placed in "Category 1 > Subcategory 1" and "Category 2 > Subcategory 2.” Any additional types will trigger an Error message from the Shoppe Online system and the CSV file will not be able to load.
Set aside ample time to define and cross-check Taxonomy (mentioned below) — the TYPE (Category, SubCategory), FILTER, and PRODUCT TAG columns, per product. Please take a look at our taxonomy guide and note that yours must match exactly as is written. Your Shopify file will already have a Category and Product Tag column. You may leave them there, however please format the data to match our template. These are SO important and will be worth your time and attention: you do not want to be missed while buyers search by keywords!
Step 3 - Update your wholesale pricing and quantities and DELETE the PUBLISHED column.
If you are exporting from a retail site, please change your “Variant Price” to your wholesale pricing. Minimum Quantity is treated as case pack quantity and will increase in multiples just like case packs. Please delete the "Published" column.
Step 4 - Use the Sort Order column to Order your products.
Items will appear from the lowest sort number to the highest. We recommend using multiples of 10 while numbering (10, 20, 30 , 40...) so that you may easily insert products between your original sequence without having to renumber everything. ie If you wanted to insert a product between 10 and 20, simply number it 11.
Step 5 - Save your file as CSV or comma separated value. The first row must be the column headers.
If you are working in Apple Numbers, it will automatically add a header row with the file name. Please be sure to delete that.
Step 6 - Step 6 - Send to hello@shoppeobject.com for a final check one month after onboarding. You can continue to add and iterate on your Product File until the date of the launch, as well as afterwards, any time during the season.
Step 7 - Upload your final CSV Product file to the SHOPPE ONLINE site after your file review is complete.
-
Step 1 - Export your items into a CSV file from your existing site. If you do not have the ability to export a CSV file, you may create your own by following Step 2 below.
Link: Exporting Product CSV from SquareSpace
Step 2 - Please use the Product File Template to match your export from your site. Please follow the directions within the template to ensure for a seamless upload to SHOPPE ONLINE. You may need to delete some columns and add others such as minimum quantity and all five or our filters.
Please be sure to check your tags, type, and filters. Set aside ample time to define and cross-check Taxonomy (mentioned below) — the TYPE (Category, SubCategory), FILTER, and PRODUCT TAG columns, per product. Take a look at our taxonomy guide and note that yours must match exactly as is written. These are SO important and will be worth your time and attention: you do not want to be missed while buyers search by keywords!
Please note: Each product allows maximum 2 types, placed in "Category 1 > Subcategory 1" and "Category 2 > Subcategory 2.” Any additional types will trigger an Error message from the Shoppe Online system and the CSV file will not be able to load.
Step 3 - Use the Sort Order column to Order your products. Items will appear with from the lowest sort number to the highest. We recommend using multiples of 10 while numbering (10, 20, 30 , 40...) so that you may easily insert products between your original sequence without having to renumber everything. ie If you wanted to insert a product between 10 and 20, simply number it 11.
Step 4 - Save your file as CSV or comma separated value. The first row must be the column headers.
If you are working in Apple Numbers, it will automatically add a header row with the file name. Please be sure to delete that.
Step 5 - Send to hello@shoppeobject.com for a final check one month after onboarding. You can continue to add and iterate on your Product File until the date of the launch, as well as afterwards, any time during the season.
Step 6 - Upload your final CSV file to the SHOPPE ONLINE site after your file review is complete.
-
Each product must be listed on one row and have a:
Title
Description
Image URL*
Wholesale Price
SKU
Minimum Quantity
Product Status
Sort Order
*Multiple image URLs will be listed one per row, please see the template and video for how to list multiple images.
**Your main product image should be a regular product image with a white or neutral background. You may use your lifestyle images as secondary images for the product.
***IMPORTANT! All product images on Shoppe ONLINE are square. If you have rectangular images, they will be cropped to center automatically.
-
Some of your products may have variations such as different sizes, color options, wording etc. Each product may have up to three different types of options with unlimited choices for each option. For example, a shoe may have a gender option (Womens or Mens), a color option (Blue, Red, Yellow, Black etc), and a size option (6, 7, 8, 9 etc). You would need to list each possible combination Women's, Blue, Size 6, Women's, Blue, Size 7 etc with it's own unique SKU.
Each product variation option must be listed on a separate row - please see the template for how product variations must be listed. Each product variation option must have it's own unique SKU. Each product variation option may have one Variant Image URL that will be shown to buyers when that selection is made.
-
Taxonomy is how your product will be found within different search methods on the Shoppe Online platform. Please see the section below for a full description of Taxonomy.
Your product file will include: Type (where you list your Categories) Product Tags (this includes the Shoppe Online Marketing Story Tags as well as any tags you wish to use) Five Filter Columns (Color, Room, Values, Materials, Origin)
Please note: Each product allows maximum 2 types, placed in "Category 1 > Subcategory 1" and "Category 2 > Subcategory 2.” Any additional types will trigger an Error message from the Shoppe Online system and the CSV file will not be able to load.
You can learn more about taxonomy below.
2. Review The Taxonomy Guide
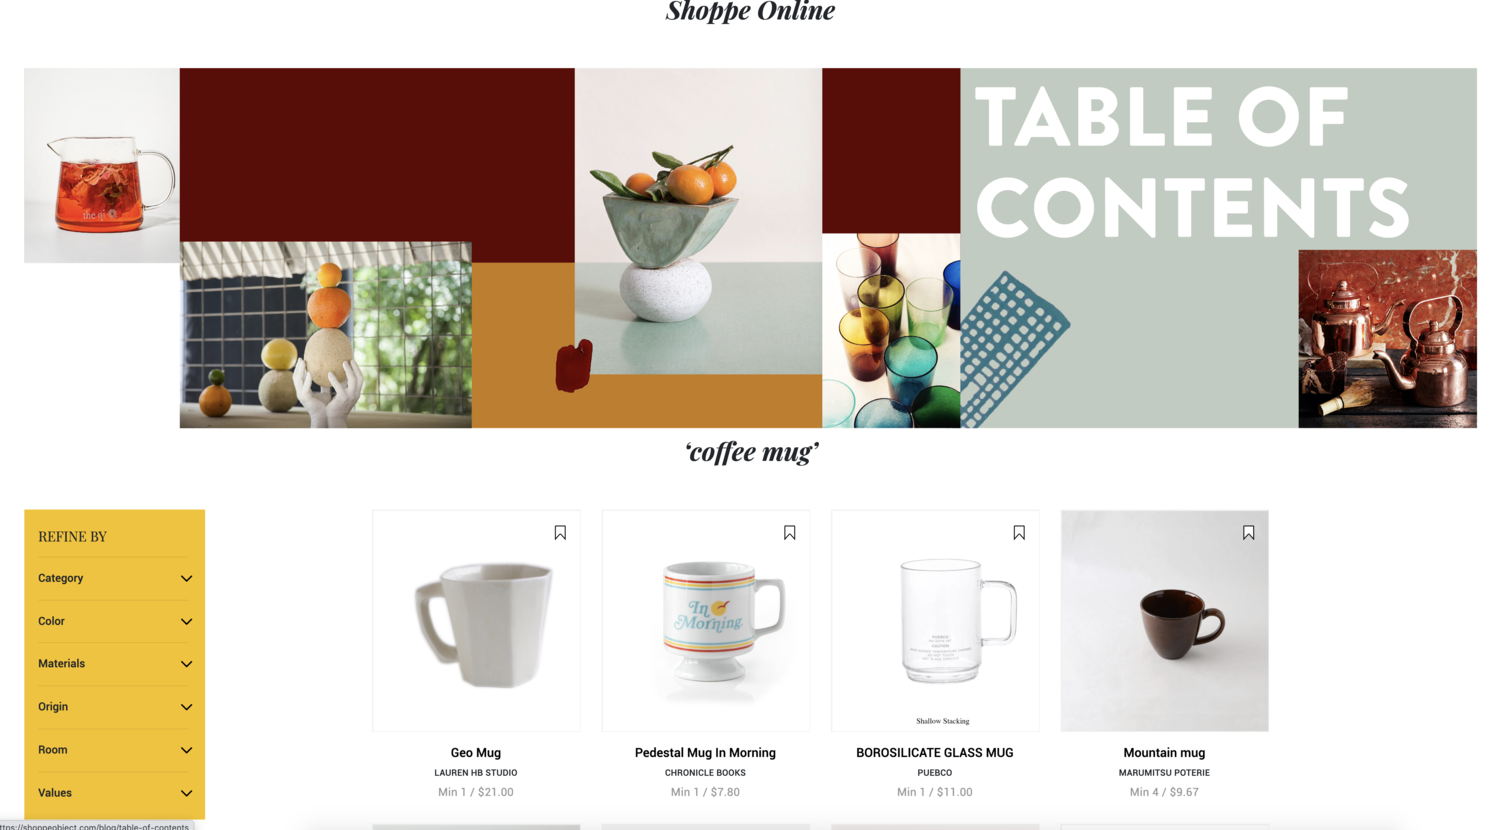
Taxonomy is how your product will be found within different search methods on the Shoppe Online platform. Buyers will find your products in a few different ways. We recommend spending significant time on carefully choosing your product taxonomy as this will be how buyers find your products.

BROWSING CATEGORIES
At the top of the site, there are the 12 main categories. Buyers may click on a main category, then click on a subcateogry to browse that selection.
PLEASE CLICK HERE FOR THE FULL LIST OF CATEGORIES & SUBCATEGORIES
Please review the tutorial video and template file on how to list your product categories and subcategories within the Type column.
Please note: Each product allows maximum 2 types, placed in "Category 1 > Subcategory 1" and "Category 2 > Subcategory 2.” Any additional types will trigger an Error message from the Shoppe Online system and the CSV file will not be able to load.
REFINING CATEGORY/SUBCATEGORY WITH FILTER BAR
At the top of the site, there are the 12 main categories. Buyers may click on a main category, then click on a subcateogry to browse that selection.
PLEASE CLICK HERE FOR THE FULL LIST OF FILTERS
Buyers may choose to view only products made in Japan or only purple products etc. Please review the tutorial video and template file for how to list your product filters.

SEARCH BAR & PRODUCT TAGS
Buyers may also search for products using the search bar at the top of the page. Search results will show matchs to your product title, description, brand name, and product tags. Product Tags may be used for general terms such as new, reversible, limited edition, etc.
Please review the tutorial video and template file on how to list your product tags.
3. Upload Your Product File
You may upload your product file by first going to your Collection page, then clicking on Edit Profile, and then on Import Items.
After the prompt box appears, please click on the CSV file option. Then you may drag and drop your Product file into the gray box and click on Begin Import.
You will then need to click on your Workdesk and then on Product Import. You will need to approve your most recent upload here in order for it to appear in your Collection.
-
It is best to always make any edits or changes to your products with your Product File and then reupload it. Reuploading your Product File will overwrite the existing data with the new file.
Uploading a new product file will not automatically delete a product. This is a safety measure. The only way to delete a product is to click on that product, click on Edit, and then on Delete. If you want to remove a product that has sold, it is best to not delete it but to "Save as a Draft". This will hide the product from view but it is still in the system and can still appear on old POs. Uploading a new file that is missing some products will force those "old" products to the top of your list.
-
While on your Collection Page, click on Edit Profile, then click on Export Items. This will automatically download your current product file to your computer.
You may use this file to make any edits to products and then re-upload the file to see those changes reflected in your Collection.
-
While you can always delete a product, this will delete that product entirely from the system. If that product has been sold, it will appear in red on the PO and if the PO has yet to be charged, you will be unable to charge for those deleted products.
If you would like to keep a product in the system, however hide it from view or sales, then you may click on "Save Draft" to mark it as Inactive.
To mark a product as a Draft, click on Edit Profile, then click on the desired product, then click SAVE DRAFT - this will keep the product within the system and you may switch it to Active at anytime in order to bring it back into view and available for purchase. You may find draft products in your DRAFTS folder.
PLANNING TO RETURN NEXT SEASON?
Brands who are already showing on the Shoppe Online Marketplace will keep their same login for the next season. You may update your profile at anytime if you need to.
Regarding your collection, we suggest creating a master CSV Product file with your current products as well as any new products that you would like to show next season.
You may upload your new file at anytime between now and the launch of the new season.
You may use Status to mark all products as either Active, Draft, or Deleted. Please check the CSV template for the code. You may mark your current products as active (Active products will appear in your Collection available for purchase) and your products for next season as Draft (these will not appear in your current Collection). You will also be able to manually change the active/draft status of a product directly on the site.
Your SKUs should be uploaded to Shoppe Online whether manually or via the Product File one month after receiving your Welcome Onboarding email from Shoppe Object (from hello@shoppeobject.com). Before uploading, if you would like to send your product file to hello@shoppeobject.com for a formal review, please do so within this one month period. This is not mandatory for existing brands.


