Writing Your Own Purchase Order On The Show Floor
Brands who will be participating in the physical show will have the opportunity to scan a buyers badge and start drafting a purchase order on their behalf. Please watch this video or follow the step by step instructions below to learn how to do so.
Step by step instructions to write orders at your booth, collect credit cards and revise orders with the app:
GO TO ORDER HQ
After logging into shoppeobject.meetribbon.com, click on the Order Writing Icon. You’ll navigate over to Order HQ.

2. START A PURCHASE ORDER
Click on “Create Purchase Order” to select a buyer and pull up your collection.


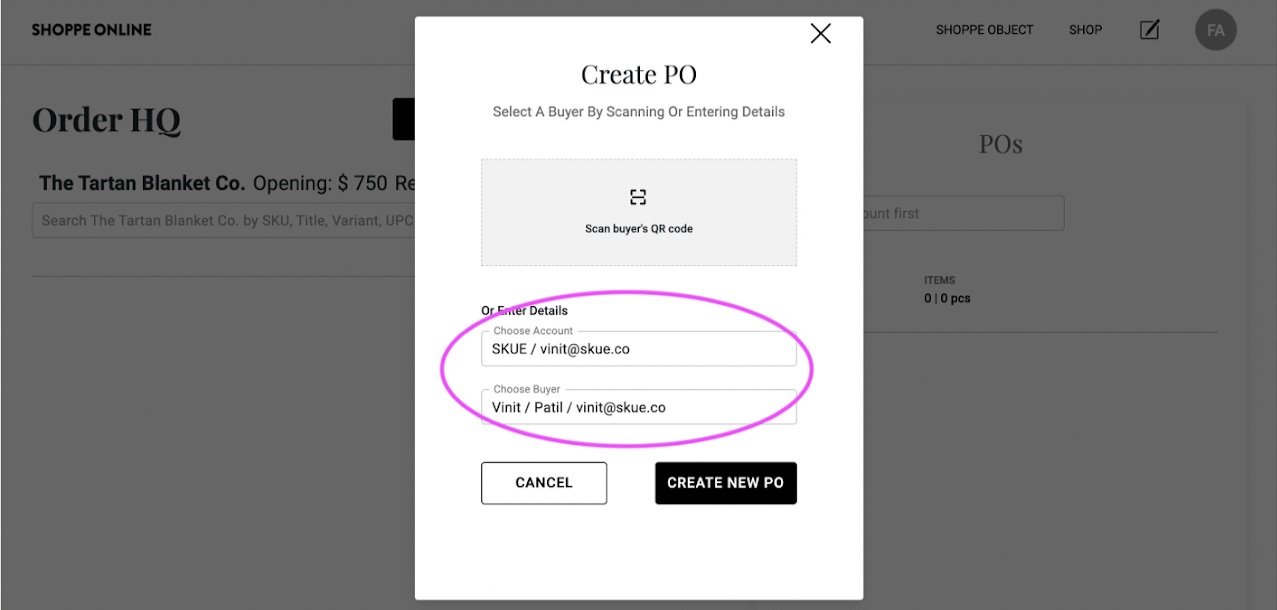
3. SELECT A BUYER WITH QR SCAN OR SEARCH
To select a buyer, you can either scan buyer’s QR code. Or you can search in the “Choose Account”. If the buyer as their QR code handy, go ahead and scan it.

4. CONFIRM CUSTOMER INFO
Account and Buyer info will auto-fill once you scan or start filling in the fields. Click “Create PO” to start.
5. ADD ITEMS TO THE CART
Once your collection loads, search for the SKU and start adding items to your order.
* You can add items that aren’t in your collection by clicking on “Create Custom SKU”

Search for SKU

Create Custom SKU's
6. CREATE DRAFT ORDER
Once you’re done, click review PO to create a draft order.

7. FILL OUT THE PO DETAILS
Most of the fields will be pre-filled with the buyer’s information. Update sections like a new shipping address, ship date or notes.

8. CAPTURE CARD INFO
If the buyer offers a card, you can save the details (with full PCI compliance) for repeat use. Cards can be charged later after working out shipping costs ect. No need to reach out to the buyer again.

9. CONFIRM PO
Click “Send PO” to confirm. Both you and the buyer will receive a confirmation email.
* You can edit an order until you confirm by clicking “Edit Items”


All your orders can be managed from your Workdesk.